
An easy way to upgrade your battlefield with loads of area terrain that looks great.
The problem
I’d been wanting some good roads to suit Epic 40k for a while — something reasonably convincing for the scale, thin, non-slip, flexible and able to lie flat over small surface variations. Ideally, I didn’t want to have to spend a lot of time on it either. I looked at lots of options online, but never found anything that I was really happy with.
Then I also started to think about mounting buildings on some sort of base material. I wanted to make them feel a little more like they ‘belong’ on the battlefield, but I didn’t want to limit the variability of terrain layouts too much.
I especially wanted to avoid warped bases, which is often a problem with larger pieces. It is so frustrating when you go to a lot of effort to create some great terrain only for the base to warp because of glue or a little humidity. Terrain that doesn’t sit flat on the gaming surface creates tends to break the immersiveness of the game for me; and it tends to wobble and move out of place too, which is just annoying.
The solution
I looked at lots of ready-made products, but nothing quite suited me. And then I finally came up with this idea: Find the right pre-printed neoprene mats, cut them into a variety of parts, and place terrain on top in whatever arrangement I like for each game. This approach ticks a lot of boxes:
- Thin, lies flat over surface imperfections, non-slip, won’t warp, easy to store.
- Easy to cut, and no painting or gluing necessary.
- Offers loads of variation in terrain layouts for very little effort.
And this seemed like a good way to do woodland bases and perhaps areas of broken ground or scrub too. Winner! If I could just find the right pre-printed mats…
Finding the right mats
I wanted a mat to cut up for woodland terrain bases, and a mat to cut up for urban terrain bases and maybe some roads. I browsed around some more and finally settled on two mats from DeepCut Studio. I’d used their Print-O-Mat service before, to get a nice space themed mat exactly the right size for my dining table, and was pleased with the service and the final product. It just so happened that of all the alternatives I looked at, these two designs by DeepCut were the closest to what I had in mind — but of course I was happy to order from them again after my earlier experience.
(In case you’re wondering, no, I have no affiliation with DeepCut studios.)
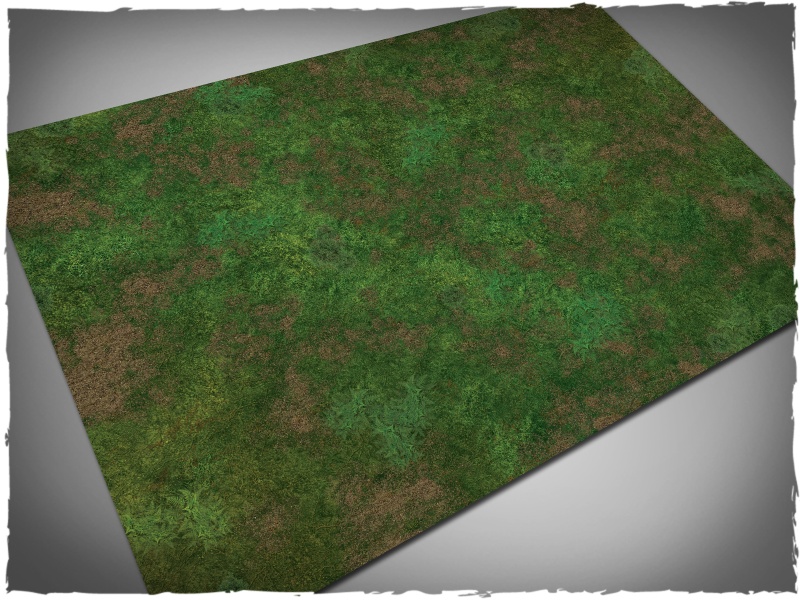
I chose this ‘forest’ mat over other green/woody options in part because I thought I could get two for the price of one — use the greenest areas for woods, and the brownest areas for broken ground or scrub.
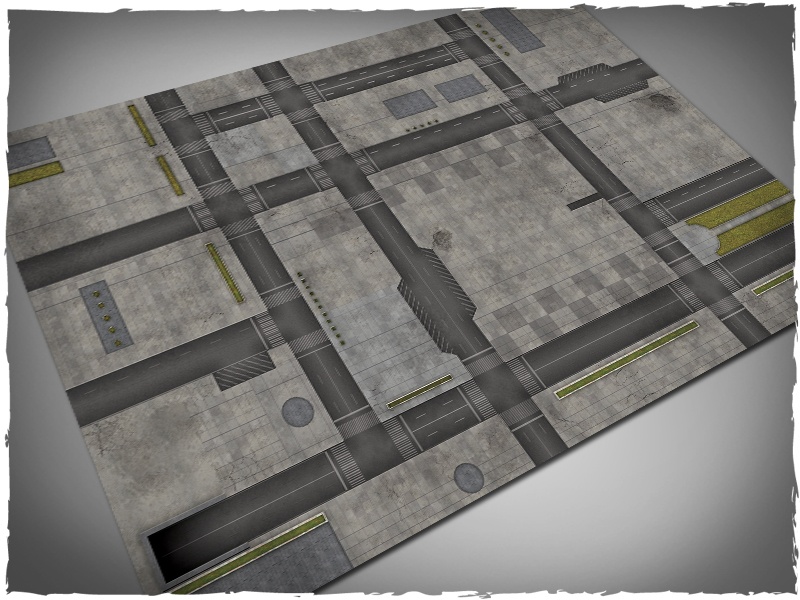
I chose this urban mat because it offered relatively plain concrete-like areas and a good amount of road sections.
Cutting the mats into parts
Cutting up the forest mat is easy. You just need a reasonably sharp pair of standard scissors. Cut around the greenest areas and make irregular but smooth edges.
You could use scissors for the cityscape mat too, but it’ll be hard to get good, precise straight edges. I used a cutting mat, a steel rule and a retractable craft knife. I found that after a few long cuts the blade didn’t cut as neatly, so I snapped a section off the blade to get another sharp bit. I did this three or four times.

Here are my before and after photographs for each mat:


How the mat parts look on the games table
Of course I couldn’t wait to see what it actually looks like on my games table. So I did a quick, basic setup with a few of the parts and Epic-scale buildings and tree stands. Here’s how it looked:


And here are some close-up views:


I’m pretty pleased with the results. I think the urban mat parts help to make it feel a little more realistic than when I just plonk all the buildings straight down onto the grass-effect table surface. And I like how flat the neoprene lies. It’s a very covenient way to make the woodland bases, broken ground and roads. The only thing I don’t like is that there are so many pedestrian crossings marked on the roads, and no bends. Oh, and I don’t love the ferns that are printed on some of the forest mat parts — but I don’t think I’ll notice them much.
In case you’re wondering what it looks like with the roads upside-down…


What next?
There are a few things that I have in mind to do when I can get around to it:
- Cut some of the larger parts into several smaller parts.
- Colour the edges of the parts to hide the whiteness of the cut edges of the surface material.
- Consider whether to bond the cut edges with some sort of anti-fray compound, for longevity.
- Make a lot more tree stands. I’ve been meaning to do this anyway.
And for the roads in particular:
- Paint over the roads to make them more plain (fewer pedestrian crossings). Perhaps make them look a bit more ‘distressed’, not quite so clean and new-looking.
- I might make the roads a bit narrower. Currently they are 85mm (∼3.25″) wide overall, with four lanes 20mm (∼0.75″) wide. This works perfectly well for Epic/6mm scale — but I think I’d prefer two lanes and an overall width of about 50mm.
- I’d like to create some bends, forks and other junctions. In which case I’ll definitely want to paint over the printed design, to make it all work well together.
Share this post