On this page:
Refight 4: The Sulphur River
| [Content from Battles Book page 79 to 81.] |
The Sulphur river that divided the Desolation Valley into two halves was impassable except at a few bridges that remained across it, and the Ork Fighta Bommer pilots had been using them for target practice. Following the battle of the Hellblade Mountains the 15th Imperial Army, under Commissar-General Mordrid van Horcic, burst through the Ork lines. Fresh units of the Legio Astartes were sent forward as the lead elements of the general advance. Commanded by Captain Harq Firmus of the Imperial Fists Chapter the lead elements raced to secure the bridges before Ork reinforcements arrived. As the Sulphur river came into view so did the dust plumes of the advancing Ork warbands. Firmus divided his battle brothers, and gave orders to take and hold both bridges until the rest of the 15th Imperial Army could catch up.
Forces
Each player picks their army to a pre-arranged points total.
Set-up
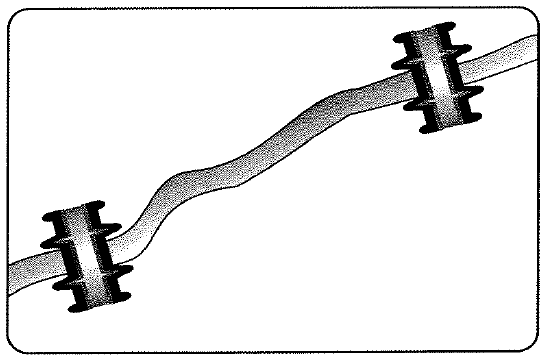
- Place a wide river with two bridges across it as shown on the accompanying map. The exact size and type of the bridges is entirely down to what you have in your terrain collection. If you don't have river sections and bridges then they can be improvised from paper or cloth cut to shape with scissors for the river, and lengths of card for the bridges. Whatever you use, the bridges should be placed so as to give each side a chance to reach one of the bridges in the first turn. The Sulphur River itself is highly corrosive, and is impassable to all units except at the bridges (skimmers and flyers can fly over it, of course). The terrain on the remainder of the board can be set up in any mutually agreeable manner.
- The players' armies are assumed to be in one or more marching columns just off their table edge. They are allowed to enter play in the Movement phase of the first turn. Any detachments that fail to enter play on the first turn are lost.
- To decide where the detachments come on the players take it in turn, starting with the player with the lower Strategy Rating, to place the HQ unit of each of their detachments on their table edge. All HQs after the first must be placed within 15cm of the position occupied by the first HQ that is placed. The position where the HQ is placed shows where the units from that detachment will enter play, and is where their move must be measured from on the first turn. If several detachments want to enter at the same point (along a road, for example) simply place the HQs in a row, one in front of the other, and measure the moves from the rearmost HQ in the row.
- Either player may split off one detachment per 1,000 points in his army as a 'flanker', if he wishes. The HQ unit for a flanker can be placed anywhere along the player's table edge; it does not have to be placed within 15cm of the first HQ that was placed.
- If you prefer you can place counters or tokens for each detachment instead of the HQ unit, just so long as you know which token corresponds to which unit.
Victory conditions
The game lasts D3+3 turns. The winner is the player who controls both bridges (ie, only has his own units on the bridges). A winning draw is achieved by controlling one and disputing the other. If the players hold one bridge each, or both of them are disputed, then the result is a draw.
Optional rules
For a real bloodbath, try playing this scenario without turn limits — to the death!
Alternative scenario
Bridges are of vital strategic importance and battles for control of bridges are not uncommon. A famous example of this is the battle for the bridges of the Skeletus river during the Ork invasion of hive world Armageddon.
In a bold move the Blood Angels Space Marines took the bridges in order to cut off the Orks threatening to overrun Tartarus Hive, and sever their supply lines. With nowhere to run, the Orks would then be slaughtered by the Ultramarines, Salamanders and Imperial Guard regiments racing back from Hades Hive. Ghazghkull recognised the trap and sent his most trusted warbands to retake the bridges. You can relight the Battle for Skeletus River using the same set-up as given above, simply by changing the Imperial Fists detachments for Blood Angels. Historically the Blood Angels took the bridges using drop pods, so if your opponent agrees you could allow the Blood Angels to deploy using the Drop Pod scenario special rules.
Historical forces
The original battle was fought between the forces listed below. The 15th Imperial Army may come to Firmus' aid as more and more Ork warbands storm the bridges.
Orks: The Ork player has the following detachments:
Detachment 1 — Gazbold's Speed Boyz, comprising one Warboss, one Weirdboy in a Battlewagon, three Kommando units, six Nobz units, three Boarboyz units, three Bikeboyz units and seven Battlewagons.
Detachment 2 — Waaa-Dreg's Stompas, comprising one Warboss Stompa, one Weirdboy Battlewagon, three Shooty Boyz, two Stompas, four Gretchin units and twelve Boyz units.
Space Marines: The Space Marines have the following detachments:
Detachment 1 — Force Firmus, comprising one Space Marine Captain in a Rhino, two Assault squads in Rhinos, one Tactical squad in a Rhino, two Bike units, one Terminator unit in a Land Raider and two Land Raiders.
Detachment 2 — Force Tardus, comprising one Space Marine Captain in a Rhino, two Devastator squads in Rhinos and two Land Raiders.
Detachment 3 — Force Supra comprising six Whirlwinds.
Aftermath
The Orks came en masse, large warbands chanting and shouting as they fearlessly stormed the bridges. Firmus' men held out all day against repeated Ork assaults, but as more Orks began to arrive, Firmus' position became untenable. Imperial reinforcements were still too far away to assist him. Finally, as Rynn's World's purple sun began to set, Firmus called for the emergency evacuation of his remaining men. He ordered that every vehicle's soul should be commended to Rogal Dorn before they were pushed into the corrosive Sulphur River to avoid them falling into the Orks' hands. Thunderhawk Gunships screamed down from orbit to lift his battle weary brethren to safety.
During the night Warboss Waa-Dreg's Boyz took both bridges unopposed.