On this page:
For the Emperor! [Imperial tactics]
| [Content from Firepower #2 page 17 to 23 (and White Dwarf #209 page 49 to 57).] |
By Warwick and Gav
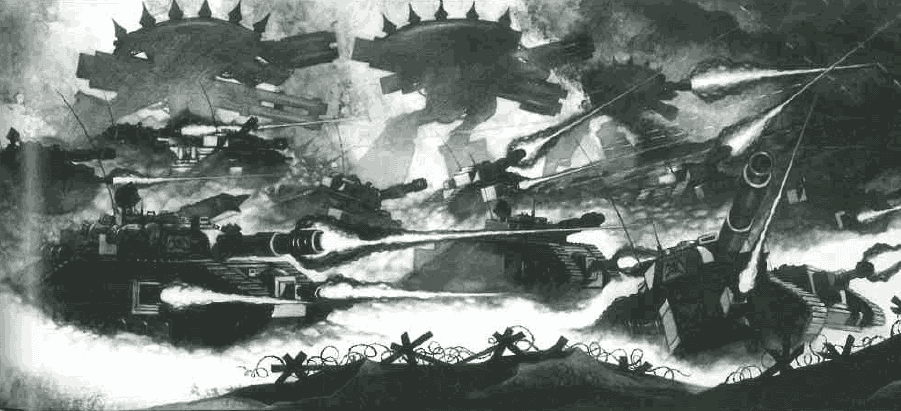
The might of the lmperium is split between several fighting forces. Although each of these military arms is a formidable foe in its own right, it is in combination with each other that they are most deadly. Imperial Navy aircraft pour from the hanger bays of massive battleships in orbit to provide air support to the massed ranks of the Imperial Guard. Immense war engines of the Titan Legions stride across the battlefield dealing death with their massive weapons. Around them the sky is filled with speeding Thunderhawks and the howl of falling Drop Pods as the Space Marines launch their lethal assaults.
The Epic 40,000 Army of the lmperium list enables you to field all of these elements in one force. Whether all of these forces are deployed together is up to you, but you will find that an Army of the lmperium is the most flexible army you can field. Each force in the lmperium can stand by its own merits, but together they are a lethal combination. It is this diversity which can also throw you as an Epic 40,000 commander — there are so many options and variations it's hard to work out what to do! To command an Army of the lmperium successfully you must know the strengths and weaknesses of each of these forces in detail, but your greatest asset is the knowledge of how to assimilate these disparate elements into one army which can sweep all before it.
Space Marines
Firepower can stop you losing a battle but it is mobility that will win it. The ability to deliver your firepower to the right place at the right time is crucial. The Imperial Guard have lots of firepower but it is the Space Marines that provide the real mobility. The Emperor's battle-brothers are the fast-moving spearhead of Imperial attacks: strong in defence, unstoppable in assault. They are fearless warriors whose unswerving loyalty will carry them through any hail of enemy fire.
The advantage of Space Marines over most other forces in the Imperial army is their speed. They can be provided with cheap transport vehicles, Rhinos and Razorbacks, and a battle tank that can also carry 2 units — the deadly Land Raider. Add Thunderhawk Gunships and Drop Pods and there is no reason why any Space Marine should have to footslog it across the battlefield!
The Space Marines are the lmperium's rapid deployment forces, capable of reacting to enemy attacks instantly, able to get to the most crucial objectives quickly and taking the battle to the enemy when and where they least expect it.
Use the Space Marines' mobility to get them into cover quickly, or snatch objectives early in the battle. Once they are in a good position get them onto overwatch. All Space Marines, except Devastators, can rapid fire, meaning they can double their firepower whilst on overwatch, in addition to the usual re-rolls. This makes for a devastating hail of fire.
Space Marines on overwatch and ensconced in cover become a very tough nut for any enemy to crack — the enemy rolls fewer dice and needs 6's to hit because of the cover's armour bonus. In the face of the Space Marine's overwhelming and accurate firepower, any assault launched by the enemy is always going to be hard-pressed. These abilities turn Space Marines into the ideal troops to hold ground and objectives. With their speed, they can reach almost any point on the battlefield you choose. There will never be many of the Emperor's finest, but used correctly they can be relied upon to hold on until relief, in the shape of the slower moving Titans or the Imperial Guard's heavy armour, arrives to secure the objective.
An alternative method of deploying is Drop Pods. These do not suffer the same vulnerability to enemy fliers as Thunderhawks, as they cannot be intercepted, but they are not as precise a tool either. Troops in Drop Pods always count as reserves, so you'll have to wait for them to become available, which is risky. Several turns without your reserves and things can start to get very tight. And then once they do arrive, their method of deploying is very random.
The risk of enemy flak remains the same so avoid it, and don't get too close to the enemy or they will snap fire at your newly landed troops. Also don't get too close to the board edge, troops which miss the table are destroyed. These restrictions make using Drop Pods difficult. The way to avoid these problems is to only deploy fast moving troops in Drop Pods. You can't deploy your vehicles in Drop Pods so Assault squads are the obvious solution. With their jump packs they can avoid terrain and double their move, or triple it if they are assaulting the enemy. You can now afford to drop your troops a safe distance away from the enemy and they will still have enough time to move forward and get involved in the battle. Another riskier solution to the problem of only having infantry deploying from Drop Pods is to March the detachment when it drops in. This is risky because Marching troops are vulnerable to enemy fire and you can bet every enemy detachment that can will fire at them, but such bold moves have been know to win battles on more than one occasion.
Detachments of Space Marines are the most flexible detachments in your army, easily capable of meeting any threat. A word of caution here though. Because Space Marines are flexible it gives you the opportunity to tailor each detachment for a specific battlefield role, but don't expect one detachment to be able to do everything. You'll find you're much better off picking a detachment to do one job very well than a generic unit which is jack-of-all-trades yet master of none.
Space Marine Armour
Space Marine armour detachments give the Space Marines real teeth. From these detachments comes the massed firepower of tank columns and close support vehicles like Whirlwinds and Vindicators. When putting together an armour detachment remember that they are best used in one of two ways. Firstly, they can be fast moving reconnaissance and assault detachments, with lots of Land Speeders supported by Attack Bikes and Bike squads. These are all very mobile vehicles, which can be held in reserve to launch fast counter-attacks, speed around an exposed enemy flank, or exploit gaps in the enemy lines. They do not have the armour to survive a protracted fight, or the firepower to stall enemy detachments, but when used for lightning assaults or surprise strikes at unguarded objectives they can still have a decisive effect on the battle.
As well as giving the Space Marines lots of mobility, the humble Rhino is also great for absorbing damage. When your Devastators or Tactical troops are in position, especially when they're not in cover, make sure that the Rhinos that got them there are moved to the front of the detachment. Because Rhinos and Space Marines in the open have the same Armour value, any hit inflicted will take out the closer Rhinos, leaving the troops with better guns alive to fire back!
The second option is to use your armoured detachment as a sledgehammer. Detachments made up of Land Raiders, Predators and Vindicators can pack a lot of punch and are slightly faster than their Imperial Guard equivalents. The mainstay of these detachments is the Land Raider. With its two anti-tank shots and good armour the Land Raider is a frighteningly powerful foe. The concentrated fire of massed Land Raiders on Overwatch can make any war engine's life difficult. You will find their anti-tank shots most valuable against well armoured enemies, like Chaos or Tyranids. Against the Eldar or Orks their anti-tank weapons will be less useful — the Orks and Eldar do not field many troops with the high armour ratings that make anti-tank weapons so effective.
The Eldar on the other hand do have a lot of anti-tank weapons of their own, which will make short work of your expensive armour. Before you go mad and make up a detachment of twenty Land Raiders a word of caution: because they only have special weapons, each Blast marker that a detachment of Land Raiders takes means they loose one shot — this can rapidly cripple a detachment even though they have good armour. What good is an expensive tank that can't fire?
Land Raiders are also vulnerable to close assaults, so it is worth protecting them with either supporting Vindicators or a screen of Tactical troops. The infantry can also bear the brunt of any damage and the effects of blast markers. You could mount the infantry in Rhinos or Razorbacks, but as the Land Raider can transport a couple of squads it does seem a little extravagant.
Razorbacks are a tricky vehicle. You need to buy two in order to transport a single Space Marine squad, which means mixed detachments of infantry and vehicles start to get expensive. They are probably most useful in small numbers giving some extra firepower to your infantry detachments because they are fast enough to keep up with the Rhinos. If Land Raiders seem like too big an investment of points then Predator tanks make a viable alternative. Their firepower is more suited to dealing with less heavily armoured targets than the Land Raider's anti-tank shots, and is also less vulnerable to the effects of Blast markers.
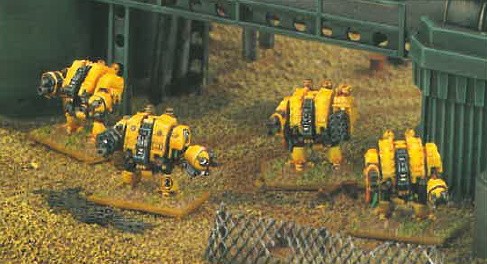
Next come the notorious Dreadnoughts. These are good in most roles but are restricted by their low Speed, which I find makes them best used defensively. If you include them in fast moving detachments then they are just going to slow everybody else down horribly, or get left behind. I would only include Dreadnoughts in defensive detachments, alongside Devastators, which will be hunkered down on Overwatch most of the game. With their high Firepower and Assault values, they make an enemy's task all the more difficult should he attempt to assault your troops.
Finally come the Whirlwinds. The main advantage of the Whirlwind is its speed. They are exceptionally fast for an artillery unit and can keep up with your Rhinos. A supporting squadron of Whirlwinds is most useful against numerous lightly armoured foes such as Orks. They do not have the longest of ranges but their speed allows them to move into firing position quickly and loose off a couple of shots before withdrawing to a safe distance. Being artillery they can also use preparatory barrages.
Thunderhawk attack!
One of the greatest strengths of the Space Marines is their Thunderhawks. A Thunderhawk on a transport mission is an effective way of deploying troops into good positions quickly; but be wary, enemy fliers with intercept missions will make [your] transport missions very hazardous, as will opposing flak units. This is not much of a problem for the Thunderhawk with its Armour [value] of 6, but it will burn you if you get too cocky.
Each Thunderhawk can carry 6 units of Space Marines, be they Tactical, Assault, Devastators, Terminators, Librarians, Commanders or whatever. This means you can tailor your rapid deployment troops for any mission you like. For holding an objective deep in enemy territory Devastators or Tactical troops are perfect. For launching a lightning attack against enemy positions take Assault troops or Terminators, perhaps accompanied by a Librarian and a Captain, or even the Supreme Commander for that all-important re-roll during any subsequent assaults and firefights.
When used carefully these troops can turn a battle, by breaking an enemy detachment or war engine or taking otherwise inaccessible objectives. However, dropping Space Marines into the heart of the enemy [forces], unsupported by the rest of your army, is a recipe for disaster. The Blast markers will invariably build up very rapidly until the detachment is useless, or destroyed. One good tactic is to use your Thunderhawk-deployed Space Marines to surround an enemy detachment you are about to assault, blocking their escape routes. When the enemy are broken by the assault they will be unable to withdraw outside of [so that they are] 15cm from your units and [so they] will be automatically destroyed. It is also worth remembering that while on a transport mission your Thunderhawk can still fire its weapons at ground targets using half its firepower.
Heed the advice of Robin Dews, the Studio Manager, whose Blood Angels have access to three Thunderhawks usually carrying eighteen units primed for close combat (Assault squads and Terminators): "Hit 'em hard and fast. Forgive no-one, and more importantly, forget nothing!"
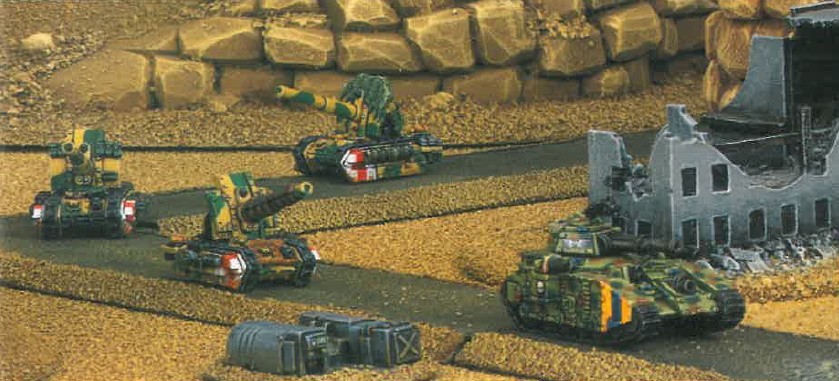
Imperial Guard tank detachments
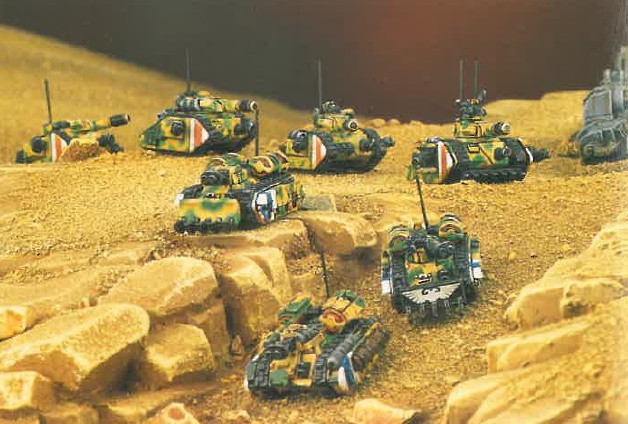
The hammer-blow of the Imperial army is provided by its columns of Imperial Guard armoured fighting vehicles. These provide a number of options, from the close support of Hellhounds to the concentrated firepower of Leman Russ battle tanks.
The Leman Russ is the mainstay of any Imperial Guard attack. It combines a moderately high speed with a truly impressive amount of firepower. The punch of a Leman Russ force can smash through weaker foes and send even enemy war engines toppling. Like all tank detachments, however, Leman Russ squadrons are vulnerable to enemy attacking them in close combat, and each one lost is a major blow to their overall effectiveness. To compensate for this you should provide at least a nominal amount of support.
This is especially important if the terrain is quite dense, since this often creates ideal sites for enemy infantry to ambush your tanks. Keep a detachment of Assault Space Marines or Tactical Space Marines close by (preferably with Rhinos so that their "armed response" covers a wide area). When the enemy threatens your tank detachment(s) just bring up the Space Marines from reserve and either deter the foe from assaulting or give them a good kicking if they try anything!
Hellhounds provide close support which is of equal value to infantry and tank detachments. They can provide additional punch to assaulting infantry, while they give a degree of protection to your tank columns should they be attacked in close combat. These close support vehicles are most useful against Chaos or Tyranid armies, who have a number of very specialised close combat troops who would otherwise tear your big armoured vehicles to little bits (extremely little bits).
You must remember that your Hellhounds will only be useful if at least one model in the detachment involved in the combat is in base contact (only war engines can lend supporting fire to a combat they are not directly involved in). This may mean sacrificing a Leman Russ or Hellhound for the cause, but when those inferno cannons start rolling back the enemy, the risk will seem worth it!
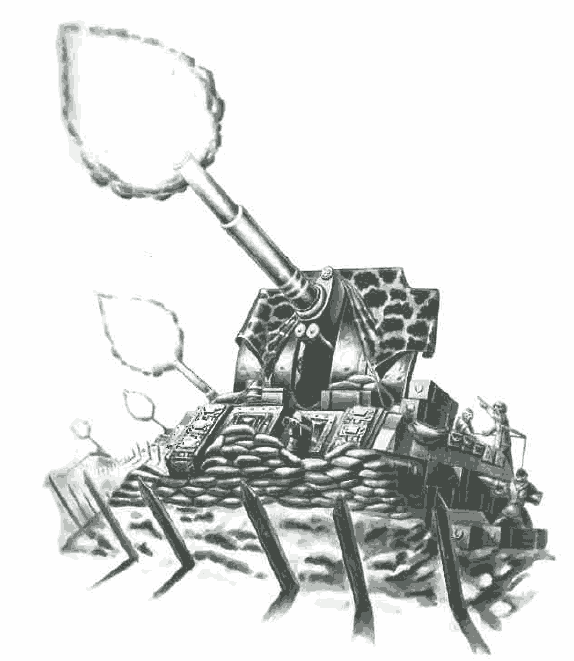
Artillery — the Basilisk
Perhaps the most feared weapons in the game, Imperial Guard artillery has a reputation for being immensely destructive. A classic example of this long range firepower is the awesome Basilisk assault gun. Imperial Guard artillery has an immense range, which means it can lend its vital fire support to wide areas of the battlefield. This is combined with its ability to fire at targets outside its normal line of fire — you can hide behind a hill or building and still bombard the enemy with an equally devastating effect. Use your artillery to target the enemy detachments which pose the most threat at the time, not necessarily just the ones that are the most closely packed. Just because a particular detachment might make a more inviting target does not mean it is the best one to fire at (don't be distracted by fast moving enemy on march orders — this may be a decoy, so think things through first!). Always keep your overall plan in mind and use the artillery barrages to destroy and suppress the enemy where they are putting up a tough resistance or threatening to break through your line. Alternatively, you can send a thundering salvo of shells onto enemy detachments which have already been drastically weakened by the rest of the army, dealing them a final killing blow.
Preparatory barrages should not be underestimated as a tactic to pin an enemy detachment in place before it gets a chance to move. Being able to shoot before the enemy moves enables you to place blast markers on the foe before they can escape. This can pin an adversary in place for other parts of your army to assault, or stop them assaulting your own army or capturing an objective.
You will lose the benefit of re-rolls for being on overwatch when you use a preparatory barrage, but the advantage of stopping an enemy from escaping your assault or preventing a fast moving enemy, such as Eldar Jet Bikes, from getting into range will sometimes outweigh the advantages of the extra damage caused by re-rolls. This is especially true against very mobile enemies who would otherwise escape your grasp or be able to move into range of their weapons and start blowing your troops apart, building up Blast markers on your detachments and generally making life miserable. You'll have to let the battlefield situation dictate your decision on this one, but all good bombardiers should bear it in mind.
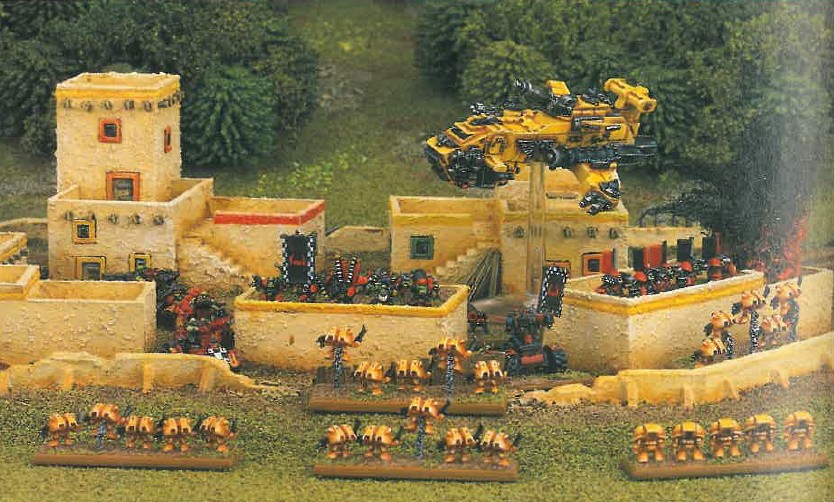
Super Heavy Tanks — the Baneblade
The combined forces of an army of the lmperium offer Space Marine commanders a huge amount of tactical flexibility with the use of Imperial Guard war engines. Baneblades, with their awesome heavy weapon battery of lascannons, battle cannons and heavy bolters, are very flexible and can usually make some impact in whatever situation they find themselves in. They are particularly useful against numerous foes — a squadron of three Baneblades has the same firepower as a Reaver Titan with three heavy weapon batteries! You will find them especially useful during firefights, should the enemy reach your lines. The super heavy tank will not be forced to withdraw if you lose an assault or firelight, because it is a war engine. This will mean the enemy end up in a firelight with it but, fortunately for the Imperial forces, the Baneblade is exceedingly good in this situation. Use Baneblades as bastions in your lines, blasting the assaulting enemy and forcing them to withdraw. Holding up the enemy like this will give broken troops time to rally and start firing again, while your other troops pour on even more pressure.
Super heavy tanks may have a hefty amount of armour and guns, but they have their weaknesses too. Anti-tank and death ray shots are particularly effective (watch out for Eldar armies, they have lots of these!) because they ignore all those thick armour plates. Also watch out for the super lifta-droppas of the Orks, as a roll of 5 or 6 is enough to destroy your expensive war engine! Attacking flyers can also cause lots of damage, so a screen of troops or tanks to snap-fire at them as they come in would be a sound (and pretty cheap in comparison to the cost of a Baneblade) investment.
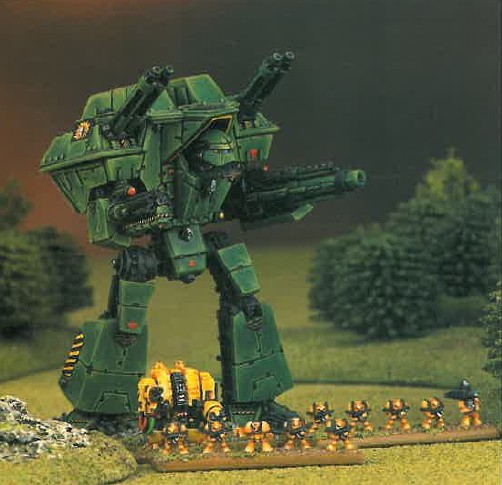
Titans — the Warlord
The Titan Legions supply the armies of the lmperium with their mightiest war engines, of which the Warlord is probably one the best examples. Titans are huge, they have good armour, can take lots of damage, and carry the biggest weapons going, not to mention the added protection of void shields. Titans, because of their size and the threat they represent to the enemy, are always magnets for enemy fire. They take a lot of damage, and can deal out a lot of damage over the course of a battle. Imperial Titans are actually surprisingly quick. Moving in the movement and assault phases they can cover up to 30cm a turn, and still unleash their full firepower. This will easily outpace infantry and most tanks. Although they are quick Titans are not very manoeuvrable. They are only allowed a single free 45° turn each phase.
Keep this in mind when using a Titan. If it rushes forward then it will be unable to retreat as quickly, which may mean it runs into trouble from which it cannot escape. Keep your Titans with the bulk of your force. A Titan that strays too far on its own becomes a huge target, and once the Blast markers build up it will be stranded, a sitting duck which will cost you heavily in army morale should it be destroyed. A Titan that gets itself into severe trouble like this can easily cost you the game. Think hard before you incorporate your Titans into your battle plan.
Titans are useful as firepower magnets. Because of their void shields and good armour they have very a high survivability, and all the time the enemy is blasting your Titan your other troops are getting on with the business of breaking the enemy detachments unhindered. If the enemy foolishly opts to ignore the Titan in favour of other targets then you can really make him pay. One turn of shooting, assaulting and then firefighting can often swing the battle in your favour!
When deploying your Titan keep its restricted manoeuvrability in mind. A Titan in the centre of your lines can only concentrate its entire firepower ahead of it, and with limited turns and arcs of fire then you could find your Titan having to shoot at unworthy targets with its devastating weapons. If you put a Titan out on the flanks then it can turn to face the entire length of the enemy line — it will never be short of targets and can begin rolling down the line, assaulting and firefighting any detachments which get into range. Beware of leaving your flank open to fast moving enemy detachments which may scoot round your Titan. Your mighty war machine will be slow to turn and stop them, leaving them to pile into your unprotected detachments beyond. Infantry support mounted in Rhinos or Chimeras is invaluable in a covering role, behind the Titan's advance, to block the route around the flank.
Combined arms
The Army of the lmperium consists of the Space Marines, the Imperial Guard and the Titan Legions, as well as the fliers of the Imperial Navy. The Space Marines provide speed and steadfast troops. They are superbly suitable to high speed flank attacks, deep penetrating assaults and for capturing ground before the Imperial Guard can move up in support. When the Imperial Guard have settled into range, the Space Marines can either stay with them using their rapid fire to lend firepower, or re-deploy rapidly to another part of the battlefield.
The massed armoured columns of the Imperial Guard, supported by their super heavy tanks and artillery are not the most mobile of forces, but the tanks carry a lot of firepower. These troops form the backbone of the force. The Imperial Guard will cause a lot of damage and occupy much of your opponent's attention. Their sheer numbers should dominate the battlefield. Your Space Marines should provide the first hit, and while the enemy is still reeling, the might of the Imperial Guard moves into range and pounds the survivors into oblivion!
Titans, in fact most war engines, are the masters of the assault. As war engines can lend support to an assault they are not actually involved in, the presence of a Warlord Titan in the middle of your Space Marine or Imperial Guard detachments will deter all but the most aggressive or foolhardy of adversaries. Although Titans can mount a huge amount of Firepower, their super-heavy weapons provide a solution to problems that other troops cannot overcome easily. For example, a Death Ray is perfect for cutting down enemy war engines (after any shields have been depleted by the Imperial Guard or Space Marines' fire, of course), while a Mega-cannon is great for softening up the enemy in preparation for an assault — no armour bonuses for cover and an additional Blast marker.
As well as deploying your Space Marines, Thunderhawks can provide the air support your army needs. They can shoot down enemy flyers, and make long-ranged ground attacks on enemies outside the prodigious range of your artillery (or take them instead of artillery altogether).
When you formulate your plan, take into account these factors. Come up with a grand strategy that exploits each of the elements' strengths and hopefully does not expose their weaknesses. Remember that over the coming months the Epic miniature range will continue to expand. In the fullness of time you will be able to incorporate mighty Imperial Guard Leviathans or Shadowswords in your force, while the Thunderbolts and Marauders of the Imperial Navy will rule the skies in the Emperor's name! However, for now the Army of the lmperium with its Space Marines, Baneblades, Warlord Titans, Basilisks, Leman Russ battle tanks and Hellhounds can provide everything you need for a hard-hitting attack or a solid defence, regardless of the enemy's intentions.
Forward for the Emperor!