On this page:
Ready for Battle [force selection]
| [Content from White Dwarf #209 page 33 to 39.] |
By Gav Thorpe
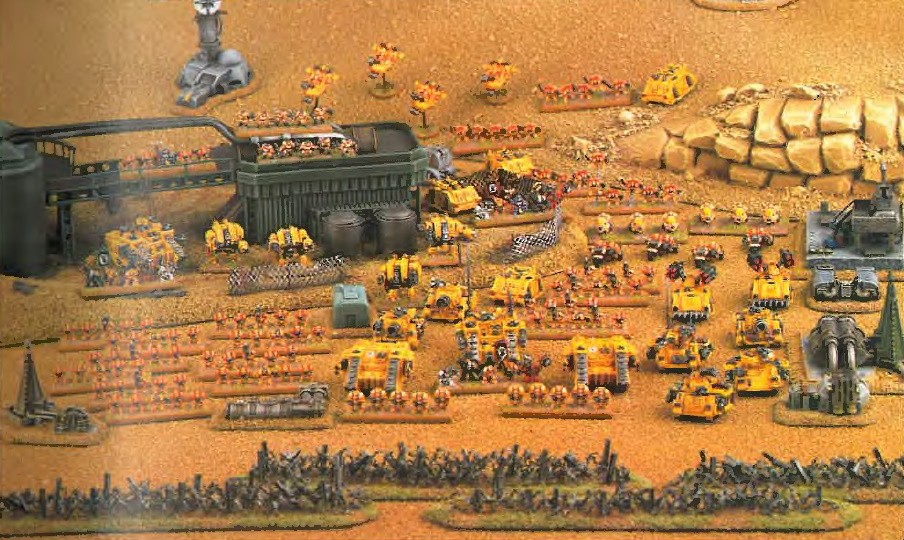
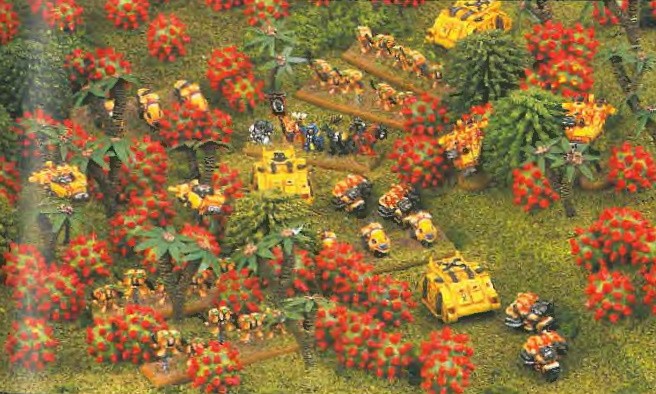
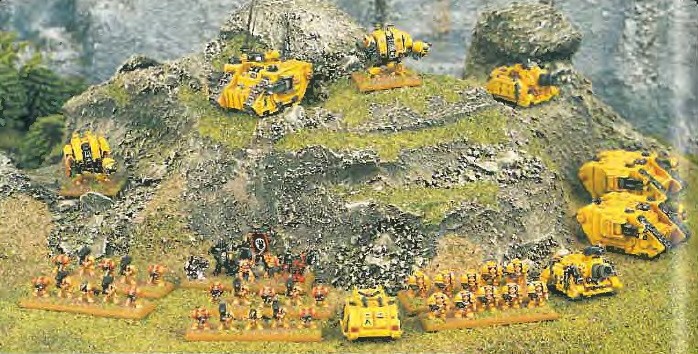
I actually chose this force for the Space Marine boxed army which will soon be available in our stores. Working from the list of what could be squeezed in to the box, I had to make the most battle worthy force I could, and I'm pretty pleased with the final result. This process is very similar to the way you'd normally put together an army, working out the best force from a restricted selection of models. Throughout this article I've treated the army as my own, though we've used the brilliantly painted Studio army to illustrate my choices.
The Epic 40,000 game gives players the opportunity to fight huge sweeping combats across vast battlefields. The player is in overall command of many troops and tanks, and his attacks must be coordinated to maximise the strengths of his army and exploit the weaknesses of his opponent. However, before any of this can start, you need an army to fight with.
The refights presented in the Epic 40,000 Battles Book describe an Ork army and a Space Marine force which you can assemble from the models provided in the box. These are a good demonstration of the way an army is organised and it's a good idea to play a few of these battles with the given armies first. This will enable you to get to grips with the rules without any unnecessary complications, and also to learn which of the troop types best suit your style of play. Armed with this information you can then set about choosing your own detachments and armies for use in other battles.
The army lists
The Epic 40,000 army lists are divided into the different detachment types available to each race. For example, the Army of the lmperium can field Space Marine infantry and armour detachments, Imperial Guard infantry, tank and artillery detachments, Imperial Navy air detachments and the war engine detachments of the Imperial Guard and Titan Legions. Within each of the detachments is a wide selection of different troops, available in differing proportions depending upon the detachment type. Choosing an army is no task to be taken lightly, and as your experience with Epic 40,000 grows, so too will your strategy and tactics. In the light of these experiences you will want to change your forces to suit the style of battles you prefer. However, to start with it is probably best to select a wide variety of different tanks and warriors to give you a good introduction to the army.
In this article I'll take you through the process of picking an army. To illustrate these ideas, I'll be picking a Space Marine force, but the principles involved apply to all the different races in Epic 40,000 (with individual variations).
What's available?
First of all, I compiled a list of the miniatures the ’Eavy Metal team had painted so I knew exactly what I’d be able to field. This is given below. By working out a list of your current miniatures first, and updating it regularly with your new acquisitions, you can save lots of hassle later. There’s nothing more annoying than starting a battle and finding out that you haven’t got enough Rhinos or something, which then leads to lots of hasty re-calculations in front of an impatient opponent.
To start with, I’ve got two sprues worth of plastic Space Marine infantry and a sprue of plastic Space Marine vehicles. The following list is what you could possibly make, though as the exact composition of some of the units (notably the Tactical, Command and Librarian units) is a matter of taste, they can’t all be made at once. Of course, later on lots more stuff will be added to my army, but even this small selection can provide a very effective fighting force.
12 Tactical units (that’s six squads of two units each. However, I will probably reduce this to ten units, and use some models for my Command units and Librarians instead)
4 Devastator units (enough for two squads of two units each)
4 Assault units (enough for two squads of two units each)
2 Terminator units (two squads)
2 Scout units (two squads)
2 Command units (this can be increased by using some Tactical Space Marines to replace the character models)
2 Librarian units (again, I will use Tactical Space Marines to fill up the bases)
2 Bike units (either one or two squads)
2 Land Raiders
2 Whirlwinds
4 Rhinos
I have also got some blister packs of metal miniatures, adding the following Space Marine vehicles to my plastic model collection:
4 Dreadnoughts
2 Command Land Raiders
3 Predators
3 Vindicators
4 Attack Bikes
4 Land Speeders
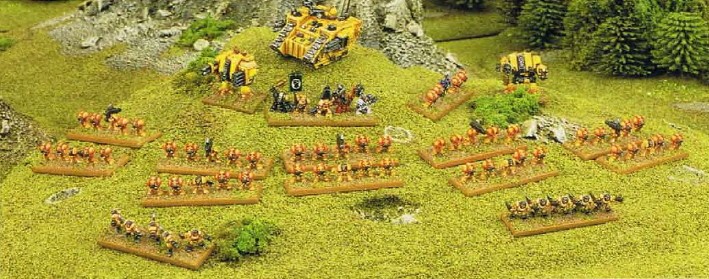
The first detachment (tactical) [Force Phemeus]
Having had a few games (six months of pretty solid war, actually!) I know that Space Marine Tactical troops are really effective — implacable on the advance and immovable in defence. My first detachment will be based around these solid troops. With these as the basis of the detachment, they’ll need to be chosen from the Main Force section, so I look at the army list and see that I need to use the Space Marine detachment list.
The Command
First of all I need to choose a detachment commander. I can choose any unit I like to be in command, and will have to pay an extra 25 points for that unit. As stated in the Armies book, your commander must be the unit furthest up the detachment’s chain of command. For example, if you had a Librarian and some Space Marines, the Librarian should be in command because he is higher up the chain of command than the other troops. For this detachment I wanted some real solidity, and so chose a Space Marine Captain as the commander. Rather than start filling in the detachment card straight away, I noted this down on some paper — it’s much easier to change things on scrap paper than to start amending your detachment cards halfway through.
Anyway, I see that a Captain costs me 25 points, plus an additional 25 points to make him the detachment commander. It would be nice to have something to mark the Captain out as special, and I notice he has the option of being mounted in a Land Raider. This seems eminently suitable, so that increases his cost by 35 points, giving a total of 85 points (25+25+35).
To give a fully rounded feel to the detachment I also include a Librarian from the Command section of the detachment list. He costs 35 points, but I don’t need to buy him his own transport because a Land Raider can transport two units — the Captain won’t mind sharing! With no other upgrades to consider, that completes my choices from the Command section.
The Main Force
Bearing in mind that I’ll want a few spare models to make up my Librarian (and possibly Command) units, I decide that ten units of Tactical Space Marines are available. Looking at the army list, I see that Space Marines come in squads of two units each — ten men to a squad. This means my ten units gives me a total of five squads. These are standard Tactical troops so there are no upgrades, and I only have 4 Rhinos available so I probably want to save them for the assault detachment I’ll be choosing later. This means I have five squads of Tactical Space Marines with nothing else, which cost me 30 points each. That’s a total of 150 points for the five squads.
Just to finish off the Main Force (and use as many of my models as possible) I add on the two units of Scouts. The army list tells me that they come in single unit squads, so my two units make up two separate squads. These cost 16 points each, adding 32 points to the detachment total.
The Support
This is a tactically flexible detachment, and looking at the profile for Space Marine Dreadnoughts I note that they are quite good at shooting and pretty awesome in close combat too — just the thing to give the detachment that added punch whatever it ends up doing on the battlefield. I decide to take just two of my Dreadnoughts, although I have four available. If I find no other use for the other two, I’ll put them in this detachment too (that’s why I haven’t filled the detachment card out yet!). The Dreadnoughts are from the Support section of the detachment list and you can’t take more choices from the Support section than you have Main Force units. Since I have seven Main force choices, I can make up to seven Support choices too, so two Dreadnoughts is no problem at all. The Dreadnoughts cost 27 points each, adding 54 points to the total cost.
Other information
So, my first detachment choice is completed. It consists of a Captain in a Land Raider, a Librarian, 5 Tactical squads, 2 Scout squads and 2 Dreadnoughts. There’s a few other details I need to work out. First of all, I’ll give the detachment a name. Most detachments are probably best named after their commander. I call my commander Captain Phemeus. There are some other facts I need to know about Force Phemeus. Firstly, it’s total points cost, which is a simple matter of adding up all the costs I’ve worked out so far. This gives me a total of 356 points (35+85+150+32+54).
From this points value I can then work out the army morale value of the detachment. This is used in most scenarios to calculate the starting army morale of your force and shows how much is deducted from that total when the detachment is reduced to half strength by casualties. Your army morale shows how willing your troops are to fight, the higher the better, and if it is reduced to zero, the army has lost all its nerve and you have lost. The formula is really very simple — total points cost of the detachment divided by 50, rounding the fractions up. 356/50 equals 7 and a bit, which rounds up to a morale value of 8.
Now that I have the morale value, I have to find out how many casualties the detachment can take before it is reduced to 50% of its starting strength. This is a straightforward matter of counting how many units there are in the detachment and then halving the total (rounding up again). There are three units in the command section (Captain, Librarian and Land Raider), 12 units in the Main Force (5 squads of two units and two squads of one unit each) and the 2 Dreadnoughts in Support. This is a total of 17 units, which means that the detachment must lose 9 units before it is at half strength.
Lastly, I need to work out the detachment’s reserve speed. This is used in some scenarios when the detachment doesn’t actually start on the table but is “behind the lines”. The faster the detachment is, the quicker it will turn up for the battle. The reserve speed is simply the lowest Speed characteristic in the detachment. Looking at the Imperial units summary in the Armies book, I see that Space Marines have a Speed of 10, Land Raiders have 25 and Dreadnoughts have a Speed of 15. The lowest is the Space Marines, so the reserve speed for the detachment is 10.
All of this information is shown on the detachment card. To finish off, I fill in the profiles of the different troops in the detachment along the bottom of the card to act as a quick reference during the heat of battle.
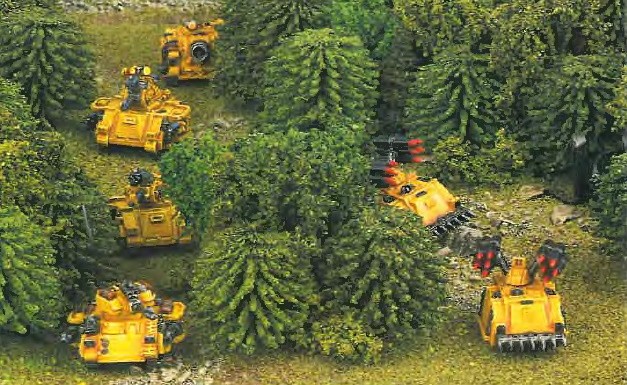
The second detachment (the tanks) [Force Cepheus]
Okay, so now I’ve got a fairly large, flexible detachment that can cope pretty well with whatever my foes throw against me. With that sorted out, I think it’s time to start specialising a bit more. For my second detachment, I decide to go for something with a hard punch. Although there are many infantry units which have a respectable amount of firepower, for that real speed and heavy shooting, vehicles are your best choice. To field a detachment of vehicles, I need to choose my tanks and artillery from the Space Marine Armour detachment list.
This detachment uses my three Predators and two Whirlwinds. These are very shooty but not all that good in close combat. Just to even things up a little, I include one of my three Vindicators as well (its Close Support special ability allows it to add its firepower in an assault, as long as it isn’t being directly attacked). I have only a limited number of command units, so for this detachment I use the option of upgrading one of the tanks to commander status. This doesn’t give the vehicle any extra abilities or anything, it just shows who is in charge. I think one of the Predators fits this role best (I don’t know why, it just seems a more command-like tank!) so one of the Predators is entered in the Command section of this list and adds +25 points to its cost (giving a total of 27+25=52 points).
The rest of the tanks come from the Main Force section. However, unlike the tanks from the Support section of the Space Marine detachment, these vehicles can be taken in squadrons. When in support, each tank takes up one of your support choices. However, in this detachment I can have up to three tanks making up one choice (in the same way that Space Marine squads are a single choice, but actually consist of two units each). This organisation only affects your army selection process. If I wanted to take Support for this detachment, I might want to field them as separate tanks, because each entry on the Main Force section allows me a choice on the Support section — by spreading the number of tanks over more entries, I give myself more choices. However, I’m not intending to take any support at all, so I just take the remaining two Predators as one squadron, the two Whirlwinds as one squadron, and the lone Vindicator.
Using the process given above, I then work out the total points value, army morale value, half strength value and reserve speed. These are all shown on the accompanying detachment card. I also copy out the profiles of the different tanks so I can admire how fast and shooty they are in just one glance! I name the detachment Force Cepheus, and they’re all ready to fight for the Emperor.
The third detachment (fast attack) [Force Geryon]
Although my tanks are pretty fast, I want some real speed in my army. This detachment can race across the battlefield to capture objectives or pin the enemy back, roar around the flanks to attack from behind, and generally cause havoc for my opponent. “Light” detachments such as these (it won’t be astonishingly big, shooty or well armoured) are useful for harrying your opponent while your other troops get into position to give them a good pounding.
First of all, I thought this detachment would be a Space Marine detachment. However, after sketching out the detachment, I realised I wouldn’t be able to field all my Attack Bikes and Land Speeders if I went this way (I didn’t have enough Main Force units to allow so many Support vehicles). For this reason, this detachment was also chosen from the Space Marine Armour list.
Juggling around
Originally I had one of my Land Speeders acting as the detachment commander, but shortly after making the decision I changed my mind. Detachments such as this are very likely to be involved in an assault or firefight with the enemy, and the bulk of my troops in this detachment were only average at this sort of fight. To help them out, I included a Librarian (having more psykers than the enemy adds +1 to your assault and firefight rolls). As the Librarian is higher up the chain of command than a Land Speeder, he was then automatically detachment commander. So that he could keep up with those under his command, I mounted the Librarian in a Rhino. Although Rhinos aren’t as fast as Attack Bikes and Land Speeders, they are much faster than an infantry unit.
As I had four each of the Attack Bikes and Land Speeders, these needed to be organised into squadrons to fit onto the detachment card (each squadron is one to three units strong). I wasn’t planning on having that many Support troops, so I just split them down into squadrons of two units each. These cost me 20 points per squadron for the Attack Bikes, and 40 points for each Land Speeder squadron. This filled up four choices on my Main Force so I could pick up to four Support choices.
I had two Bike units to field somewhere, and they neatly fitted into the role of this detachment. Like the vehicle squadrons, the Bikes can be fielded in squads of one to three units, so both my Bike units were included as a single squad and took up one Support choice. As I mentioned earlier, these fast detachments are likely to end up in a firefight or a close assault, so to give extra strength in close combat, I wanted to include my four units of Assault Space Marines. To keep up with the Bikes these would need some form of transport, and so I mounted them in Rhinos.
Using upgrades
This is a good place to explain how the upgrades in the army lists work. I had two Assault squads and wanted to include them in the Force Geryon. The way this works is as follows. I start by choosing a Space Marine squad for 30 points. The army list tells me that I can upgrade them to Assault Space Marines by paying an additional 4 points. This gives them the Assault and Jump Packs special abilities.
As part of the same choice, I can also mount the squad in a Rhino, which is one of the fastest transport vehicles around and seems perfect for their role. This costs an additional 7 points, but is still included as one choice from the Support section.
This means that my Bike squad and two Assault squads in Rhinos fill up three Support entries, which is fewer than my Main Force choices and so is allowed. As you can see from the detachment card on the previous page, the Assault squads and their attendant Rhinos are all entered on one line. However, this doesn’t mean they can only transport those troops. If the command Rhino is destroyed I could leave one of the Assault units behind and the Librarian can be carried by one of the other Rhinos.
|
Space Marine squad: 30 points Consists of 2 Space Marine units
|
Again, I worked out the number of units, total cost, Reserve Speed and so on. When working out your Reserve Speed, it is important to remember what troops are being transported in other vehicles. In this case, although the Assault squads would normally only have a Speed of 20 (taking their Jump Packs into account) and the Librarian has a Speed of 10, they are all being carried in Rhinos which have a Speed of 30. This means the detachment’s Reserve Speed is 30 (pretty fast!). Hmmm... I think many of us would find this 'cheesy' as other games set in the 40K universe don't usually allow troops with jumps packs to squeeze into Rhinos, if I recall correctly...
The final detachment (heavy firepower) [Force Praepollo]
Although I have my tank detachment, I could still do with some troops that can pour some serious amounts of firepower into the enemy (and anyway, I still haven’t used my Devastator units!). Everything that’s left over was put into this final heavy firepower detachment.
Although I wasn’t envisaging this detachment to be zooming all over the place (settled on overwatch to maximise their firepower would be better) it would help if they had some speed to reach a good firing position as soon as possible. As you can see from the detachment card, this is a Space Marine detachment. The Main Force units were selected in a similar way to the Assault squads. Devastators are chosen as Space Marine squads with the Heavy Weapons special rule, and one squad was mounted in a Rhino. The Terminators only have the option of being mounted in a Land Raider, so both squads made full use of this. I actually took one of the Land Raiders to transport one of the Devastator squads, since both Terminators could fit into one Land Raider and I had run out of Rhino models. I still had a metal Command Land Raider left over, so the Captain was given this, both as a means of transport and also for those two nasty Anti-tank shots the Land Raider has.
With my Main Force chosen, it was time to fill out the Support. Although the Devastators are really good at long range, their heavy weapons encumber them and make them less effective in assaults. To counter this I included two Vindicators, which as mentioned earlier can lend great short-ranged fire support. I also decided to put my last two Dreadnoughts here as well, rather than in the tactical detachment, because they have a hefty firepower and will also be able to cut up any enemy trying to assault the detachment. The Vindicators can keep up with the transported troops but the Dreadnoughts’ speed is somewhat lower so I will have to be careful not to leave them too far behind. Hopefully, the Dreadnoughts will have reached the bulk of the detachment before the enemy can threaten them with close combat. The only other downside is that the Dreadnoughts’ speed of 15 reduces the detachment’s Reserve Speed to 15 as a whole, making it less likely they’ll turn up quickly. However, with their extra range, hopefully turning up a little later will not have too serious an effect on the usefulness of the detachment.
The end is near
So, after checking all my points costs and calculations (as well as making sure I had everything I needed in terms of models) it was time to fill in my detachment cards. With the mix of detachments at my disposal, my opponents would never be quite sure what they were facing. With everything included, my army is now worth 1203 points (I can quite easily drop Force Geryon for a 1,000 point battle). Not bad considering that there didn’t seem to be that many troops and tanks to start with! Of course, this is just the start of the army, and a war engine or two, possibly some Imperial Guard detachments and definitely some flyers will be joining the valiant Imperial Fists in due course. As the collection grows this choice will become even wider still and new troops and tanks can be formed into new detachments or I can reorganise the ones already picked to incorporate any recruits. In terms of the look of the army, it would be nice now to add something a bit bigger, like a war engine or two, or maybe a Thunderhawk with a detachment of Assault squads or Terminators inside.
All that’s left now is for me to wish you all the luck you deserve! Happy gaming!